
Hey friends,
Here's where we were at the end of the last email...if you'd had the chance to read it yet.

My next job was to attach the plasterboard to the stud wall. I think you'll all know how it's done so I'll just point out a few things:
- For a dividing wall like this it's always worth going for acoustic plasterboard as it's not much more expensive. It's a good idea to double it up on both sides of the wall but because space is a bit limited and my door lining is only wide enough for a single board I didn't bother here. I will of course be using acoustic wool between the studs at some point.
- Floor to ceiling is about 2.5m high so ideally I'd have used one sheet from top to bottom but I can't fit these sheets or even the standard 2.4m sheets up the stairs so instead I cut them roughly in half.
- Because my studs are spaced 600mm apart I need all edges to be attached to timber hence why my noggins are in a straight line rather than offset. The 600mm spacing did make it a quick job though.
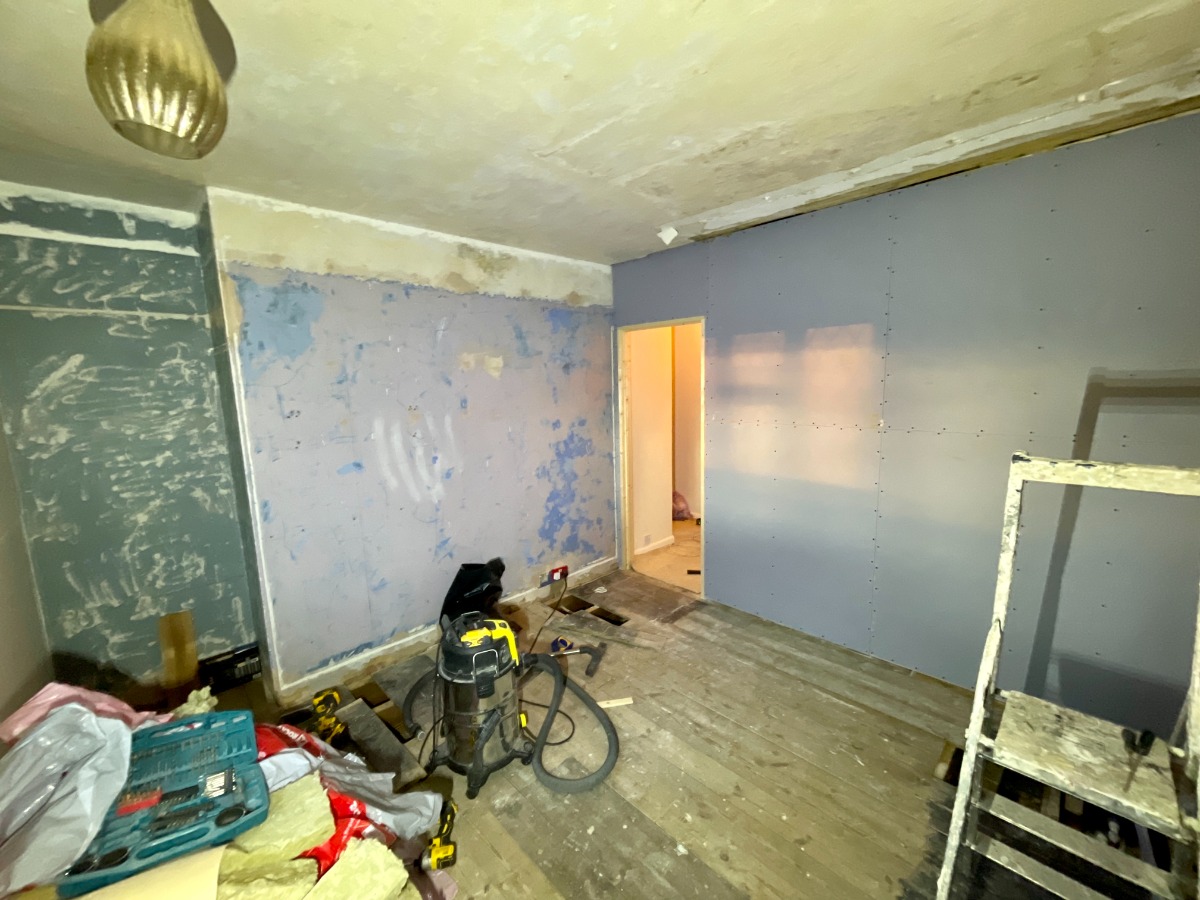
After this I moved on to the room proper and first needed a solid floor to work on. I replaced a few missing and damaged boards with those I'd previously taken out the new bathroom. These are all de-nailed and loose for now and I'll likely discuss why I'm not swapping them for chipboard in a future edition.
🔌 Adding Sockets
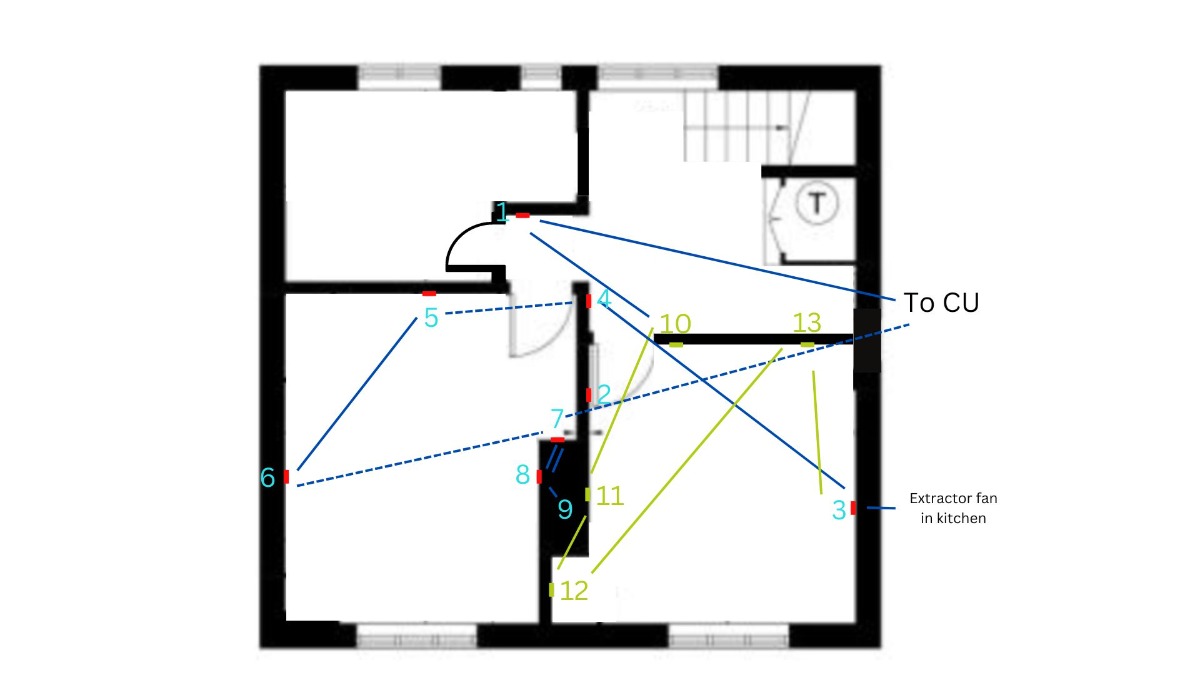
This room only has two sockets, one of which is behind the door - not ideal. In the diagram below the green sockets are the ones I want to add and socket 2 (behind the door) I want to get rid of.
First I needed to trace all the cables to figure out the circuit. This took me a long time because I thought that the third cable in socket 3 went to the consumer unit but instead goes down to the ground floor to serve the extractor fan in the kitchen. When I realised this I took off the sockets in the other bedroom and indeed there was an extra cable that must complete the ring back to the CU.
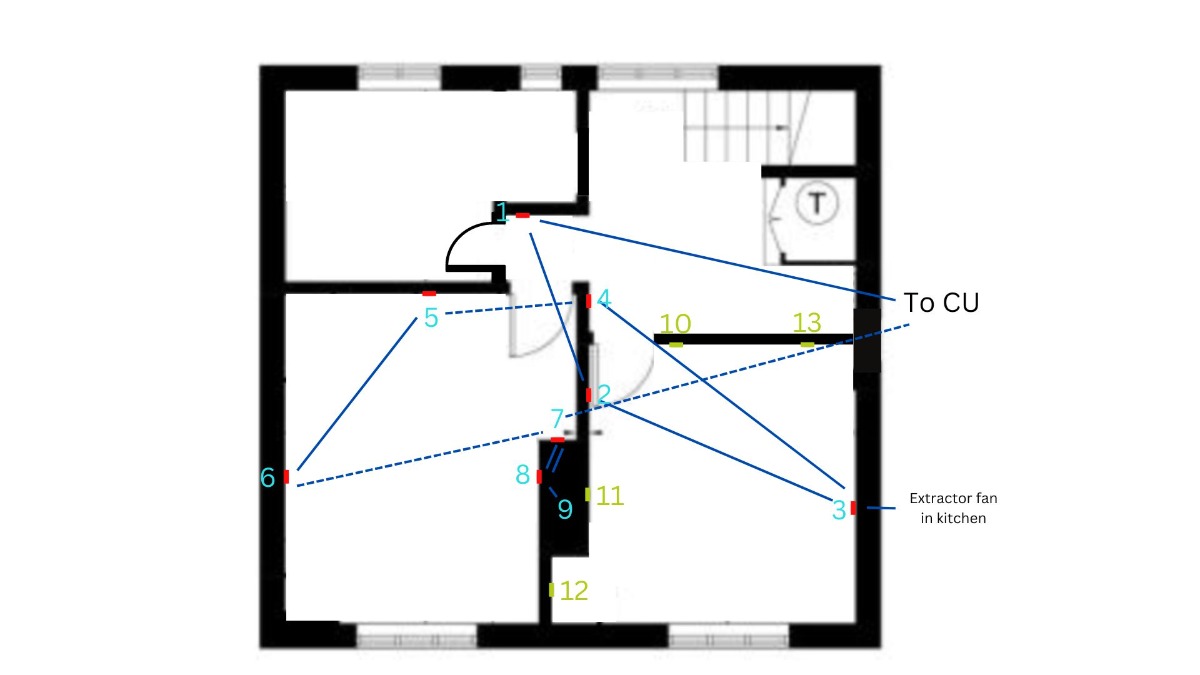
Even with the diagram above I needed a better visual so plotted them all out like so.
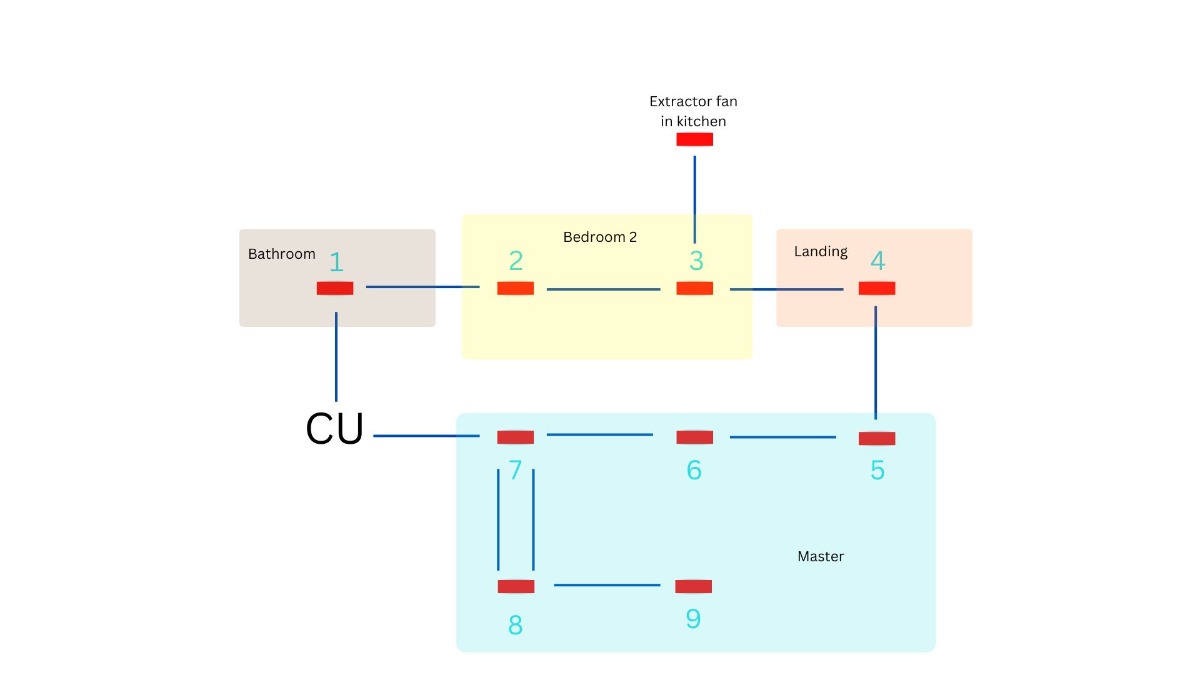
Okay that makes sense.
I just need to extend the circuit between sockets 1 (bathroom UFH) and 3. The existing cable that goes from socket 1 to 2 can be diverted to new socket 10.
The other way of doing it would be to spur (like how socket 9 or the extractor fan are spurs) one or two of the new sockets from the others but with the floorboards up it's easy enough to put them all into the ring.
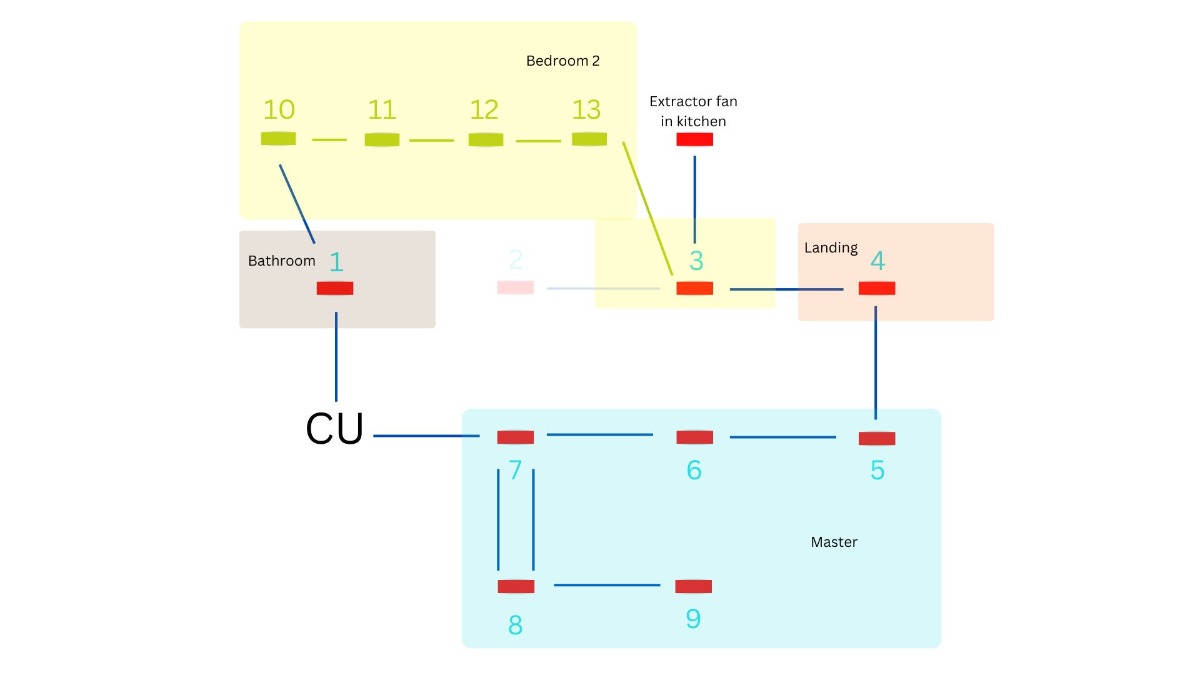
With that cleared up I needed to decide on the height of the sockets. In a new build there are regs to follow so that sockets are high enough for those in wheelchairs to reach (min 450mm from floor) but you don't need to follow that in an existing property, extensions included.
The only socket I'm keeping (socket 3) is right above the skirting which isn't a good look so I moved it up about 6cm. Fortunately the existing cables had enough slack to allow this. Then using my laser level I marked out the height of the others to match.
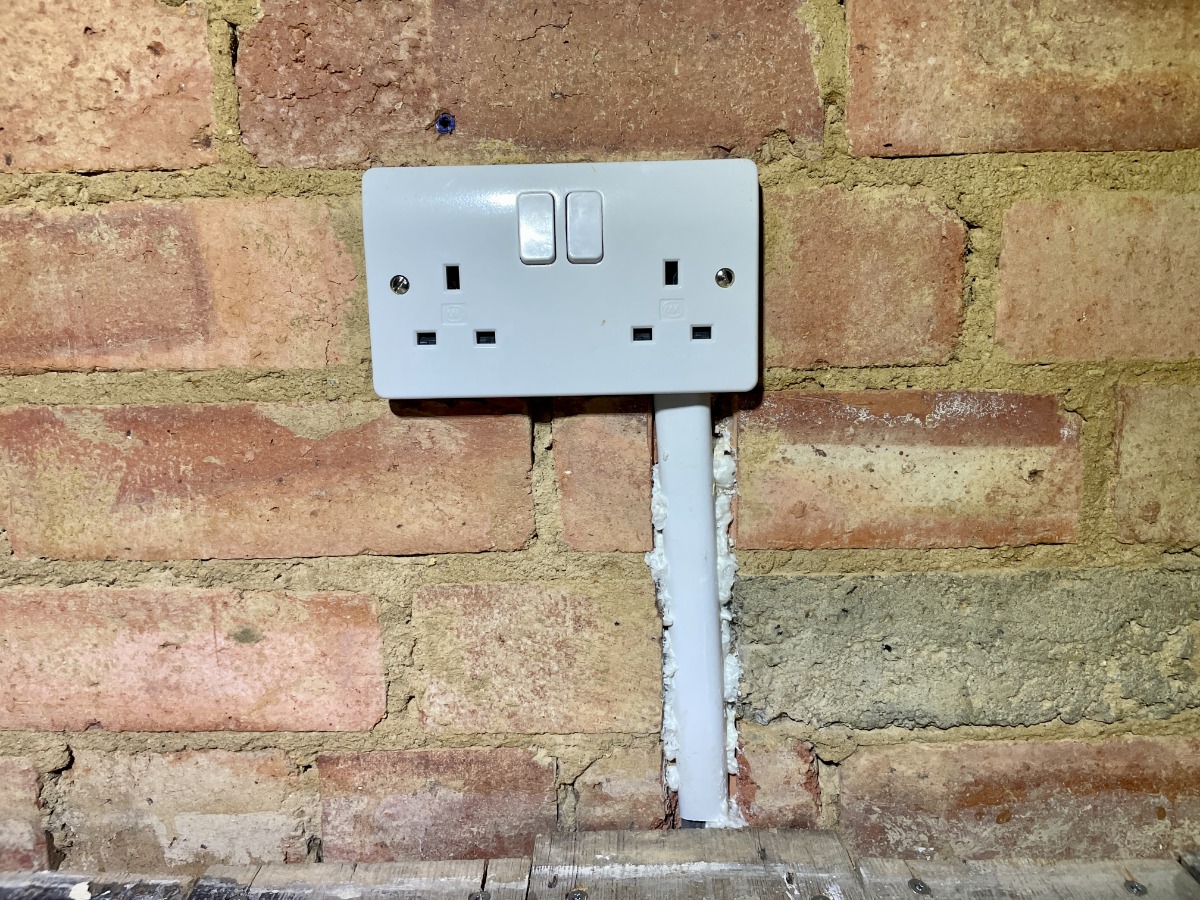
Whether or not I'm keeping the existing plaster we'll look at in future but I want to keep it for now as a reference for how deep my back-boxes should be. To cut I used my angle grinder and bolster chisel to knock out the plaster. Then I switched to my SDS drill with chisel bit (and in chisel mode) to hack back the brick to the required depth. Then I marked and drilled a couple of holes, popped in a wallplug and screwed tight. If you go too deep you can use a plastic packer to bring it out again or maybe a little bit of spray foam or bonding plaster. Better to be a bit too deep than protruding though.
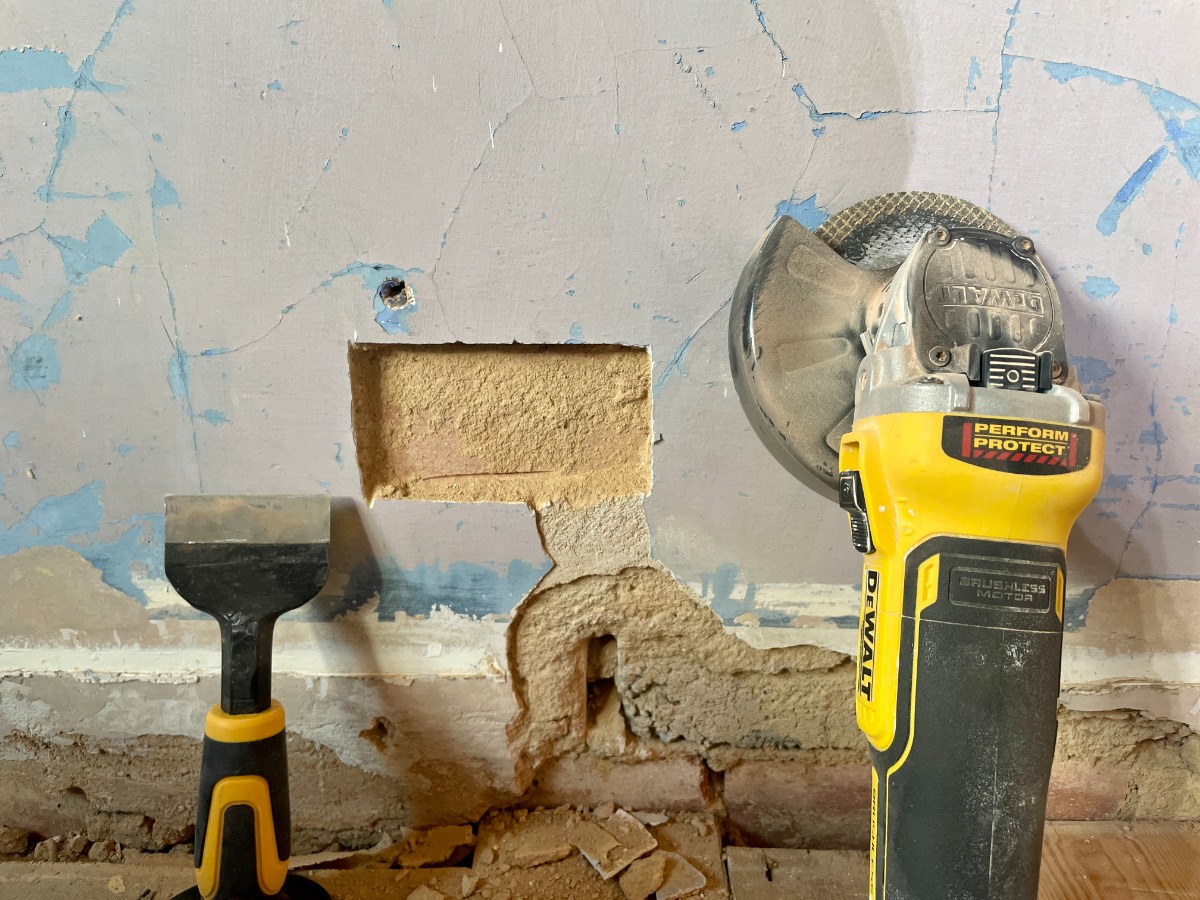
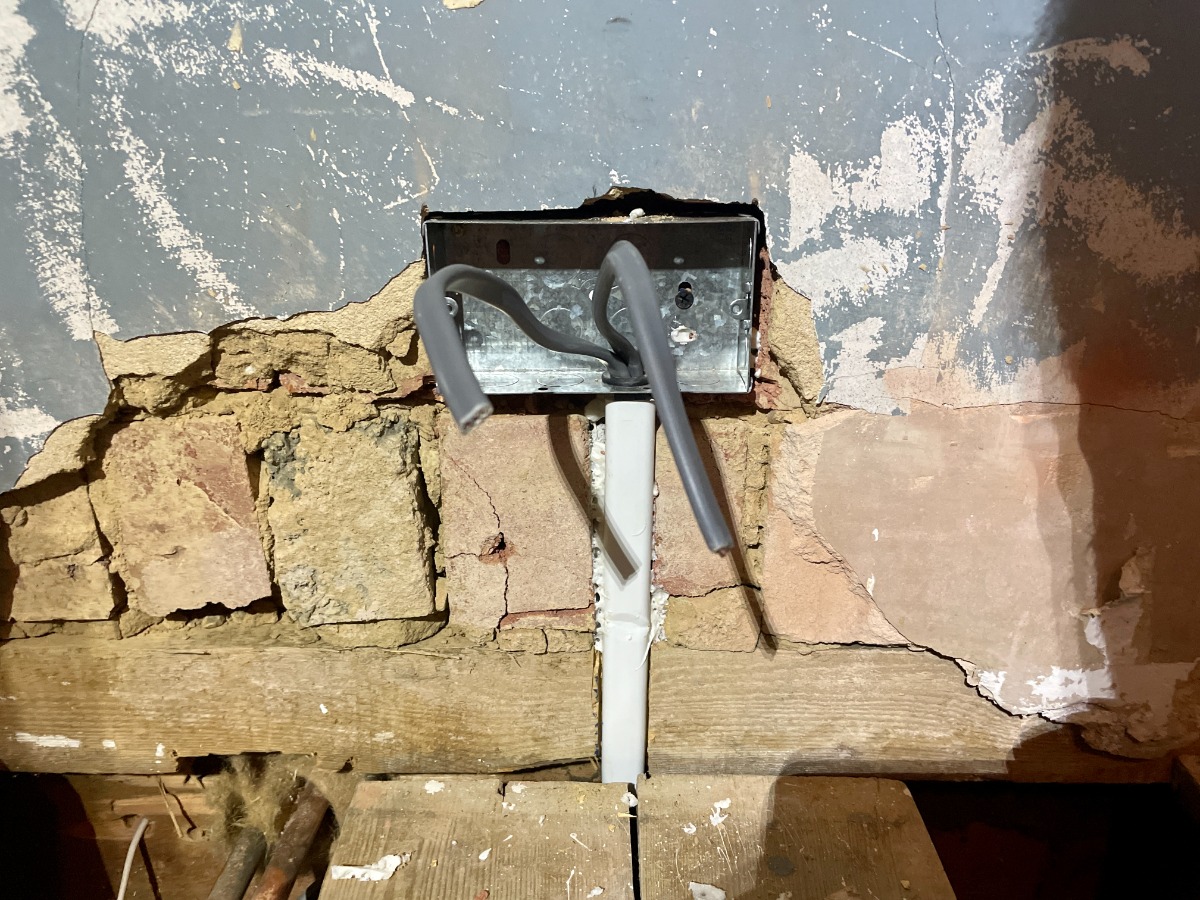
I also chased out a route for the cables and popped them in a plastic conduit. They're a bit flimsy and don't cut particularly well, nor will they stop someone screwing through them so your other option is to cap the cables with metal channel, though that's tricky to fix to brick. Another reason I prefer timber construction.
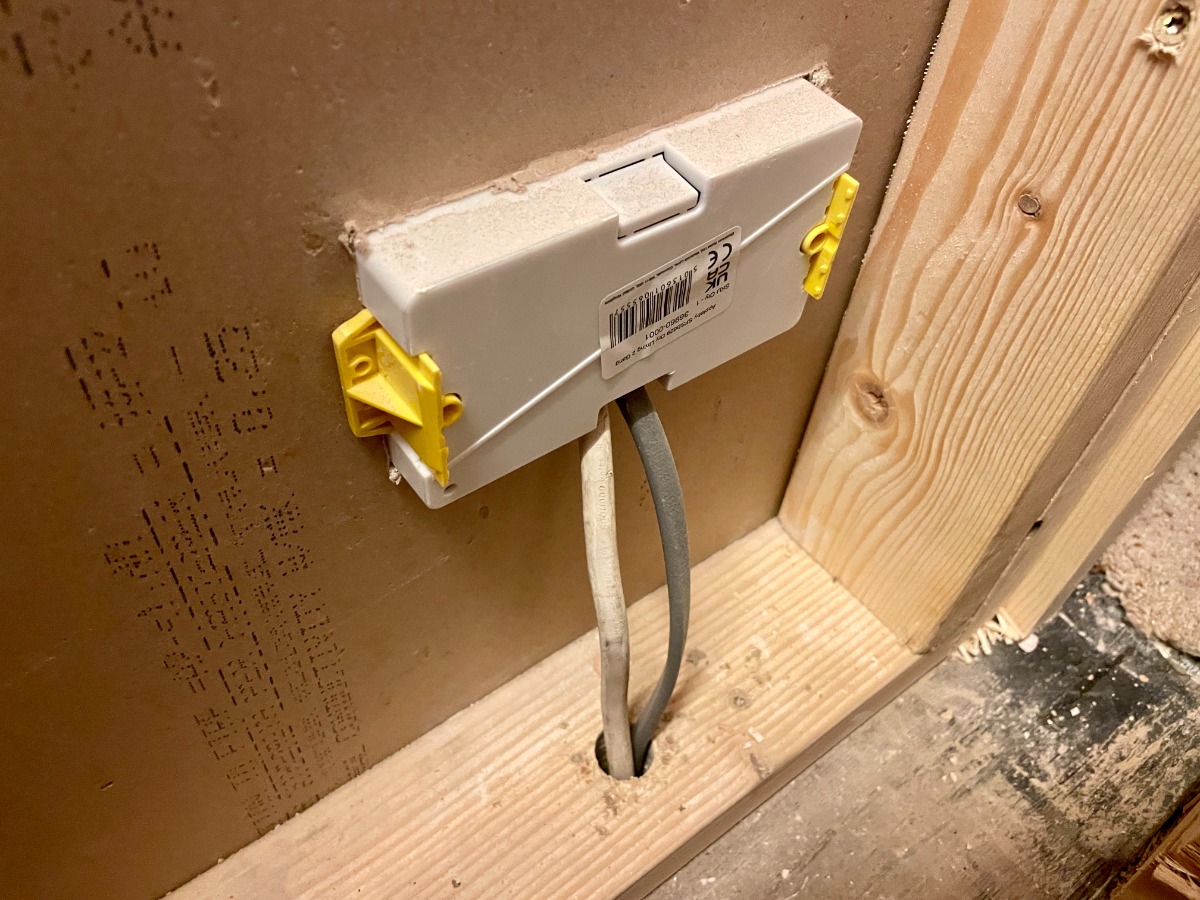
For my stud wall, the back boxes are plastic and squeeze the plasterboard to stay put. No chasing required.
Going back to not spurring the sockets another beenfit is you never know when you might want to spur off a socket in future and you can't spur twice. It only just occurred to me that I should probably take a spur from this socket up into the loft to have a socket there which I wouldn't have been able to do had this socket been a spur.
My sockets are MK Logic which get raved about for reliability though I do find the screws to clamp the wiring rather stiff. Nor do they come with screw caps, though I'm not that too fussed about that.
For socket 13 in the corner where we envisage a chair by the lad's cot I put in a different socket which has both USB A and C (newsletter provider doesn't want to link my link: https://www.screwfix.com/p/lap-13a-2-gang-sp-switched-socket-3a-2-outlet-type-a-c-usb-charger-white/398jx).
Most of our charging cables are USB A but I expect them to go out of use in the next few years in favour USB C so we're covered for both. The other thing to look out for is whether the USB sockets are capable of fast charging and can handle charging laptops. Most it seems are not but this one is, supposedly. I'm yet to try it. The only reason I'm not using this type everywhere is the cost (at nearly 6 x the price of the MK Logic).
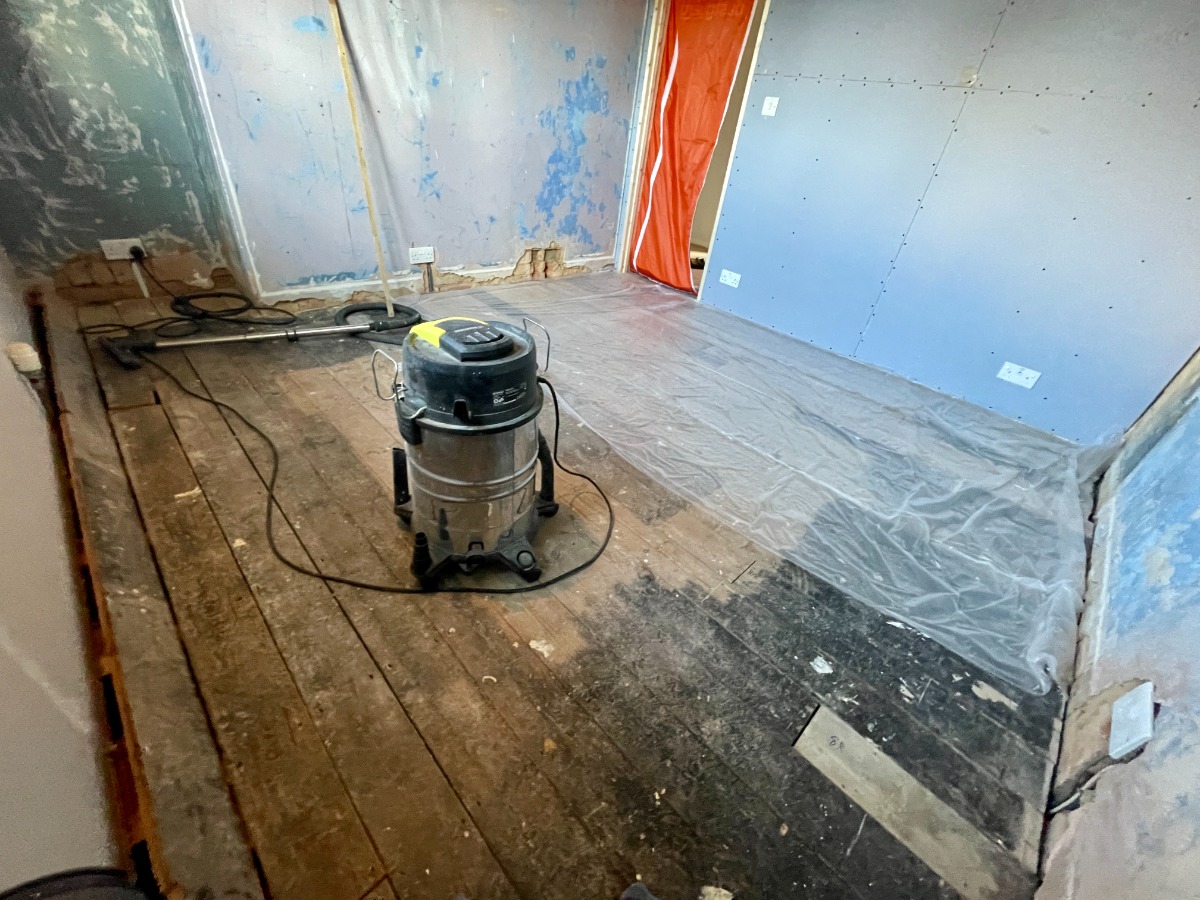
Here you can see all 5 new sockets and in the far corner the one I removed. You might be able to make out there was another outlet next to it - an aerial socket which when I followed the cable went nowhere!
I'd say that without a cable for a switch, wiring sockets is a bit easier than a lighting circuit but unlike, say, plumbing where the worst that can happen is you get wet, electrics are dangerous and shouldn't be attempted if you're not competent. While I did this myself I won't be going into the wiring detail here. Just a few points:
- I used 2.5mm2 T&E cable clipped to the joists for heat dissipation, fire safety and neatness.
- If you're mixing old and new wiring (different colours) you need a sticker on your CU.
- I bought these wire strippers - they're excellent.
- You'll need green and yellow sleeving for the earth wires. I got mine from Homebase as I was nearby which was 50 X!!! more expensive metre for metre than screwfix. Other than picking up the odd potting plant I'm not sure why anyone bothers going there.
- Take a moment to appreciate we probably have the greatest designed sockets in the world :)
👋
Hit "reply" if you've got any comments on this week's newsletter – otherwise I'll see you next time. Have an epic week :)
P.s. If you think a friend will enjoy this newsletter, feel free to send them this link where they can sign up.
P.p.s. You can find all previous newsletters here.
0 comments